 Cascade Trainer GUI
1. Introduction
Cascade Trainer GUI is a program that can be used to train, test and improve cascade classifier models. It uses a graphical interface to set the parameters and make it easy to use OpenCV tools for training and testing classifiers.
If you are new to the concept of object detection and classifiers please consider visiting http://opencv.org for more information.
2. Installation
2.1. Prerequisites
Currently Cascade Trainer GUI can be used on Windows (7 or above). The installation procedure is pretty straightforward and it only involves pressing a couple of “Next” buttons.
3. How to Use
In this section different parts and functionalities of Cascade Trainer GUI are described. Note that by moving your mouse over to each element on the graphical interface you will get a short description of it at the bottom status bar.
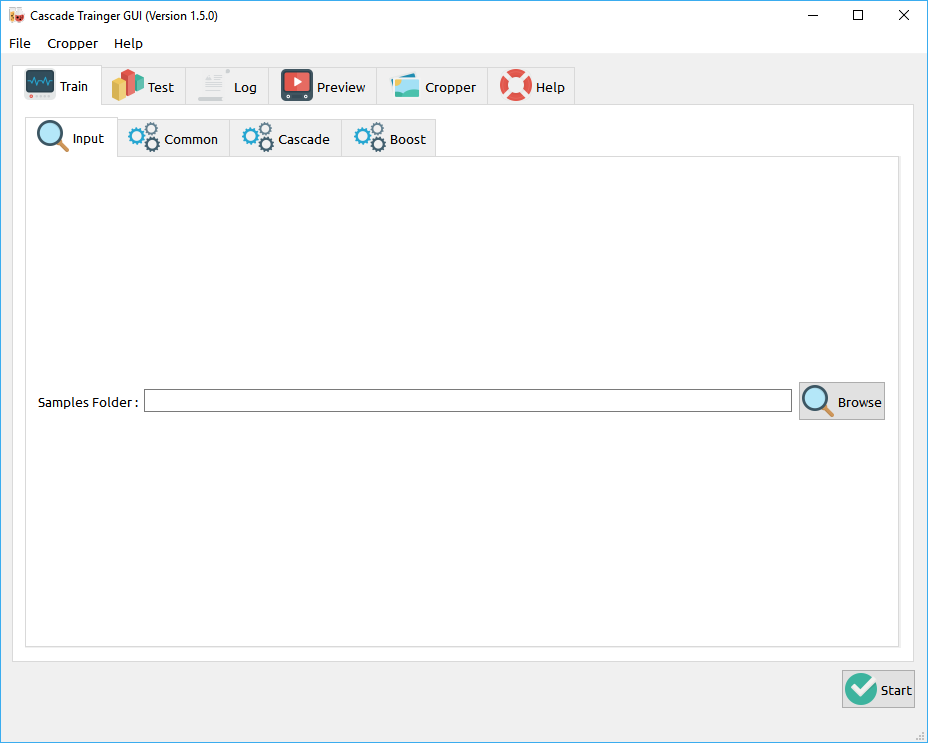
When Cascade Trainer GUI is first started you will be presented with the following screen. This is the starting screen and it can be used for training classifiers. To train classifiers usually you need to provide the utility with thousands of positive and negative image samples, but there are cases when you can achieve the same with less samples.
To start the training, you need to create a folder for your classifier. Create two folders inside it. One should be “p” (for positive images) and the other should be “n” (for negative images).
For example, you should have a folder named “Car” which has the mentioned folders inside it.
Positive image samples are the images of the object you want to train your classifier and detect.
For example, if you want to train and detect cars then you need to have many car images.
And you should also have many negative images. Negative images are anything but cars.
Important Note 1: Negative images must NEVER include any positive images. Not even partially.
Important Note 2: In theory, negative images can be any image that is not the positive image but in practice, negative images should be relevant to the positive images. For example, using sky images as negative images is a poor choice for training a good car classifier, even though it doesn’t have a bad effect on the overall accuracy:
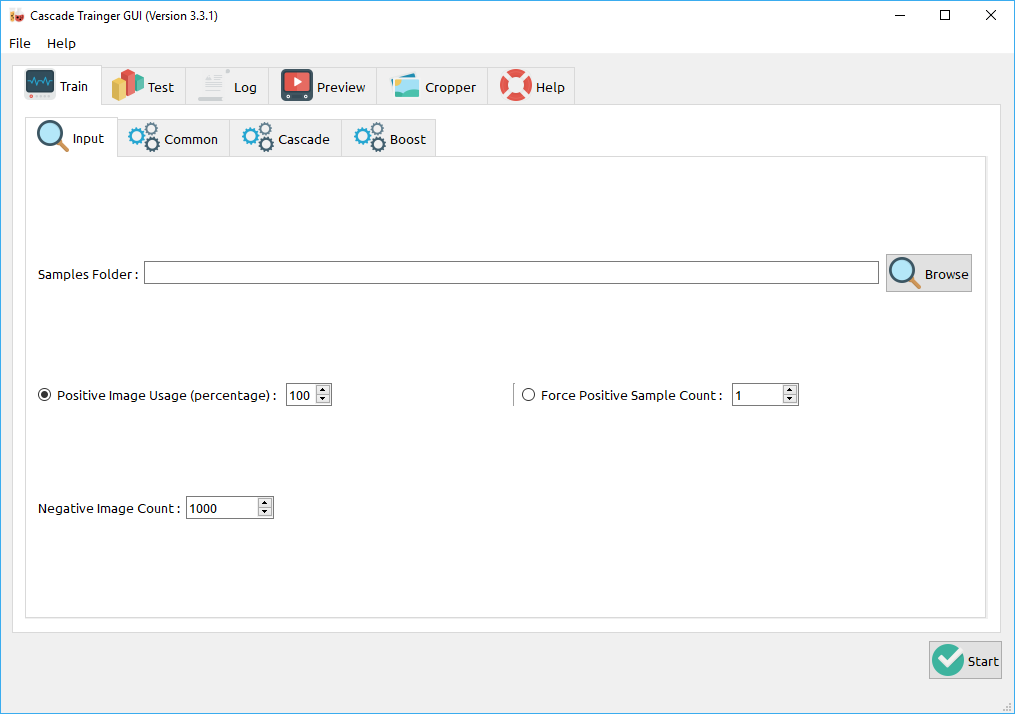
Start by pressing the Browse button in Train tab. Select the folder you have created for the classifier.
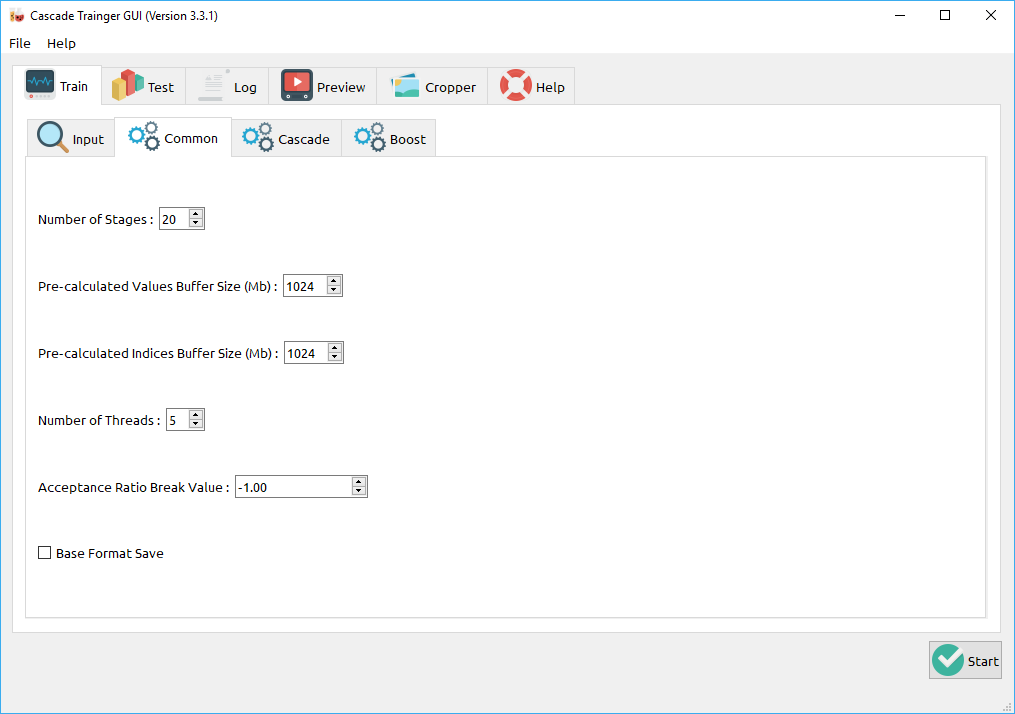
Common, Cascade and Boost tabs can be used for setting numerous parameters for customizing the classifier training. Cascade Trainer GUI sets the most optimized and recommended settings for these parameters by default, still some parameters need to be modified for each training. Note that detailed description of all these parameters are beyond the scope of this help page and require deep knowledge about cascade classification techniques.
You can set pre-calculation buffer size to help with the speed of training process. You can assign as much memory as you can for these but be careful to not assign too much or too low. For example if you have 8 GB of RAM on your computer then you can safely set both of the buffer sizes below to 2048.
Next you need to set the sample width and height. Make sure not to set it to a very big size because it will make your detection very slow. Actually it is quite safe to always set a small value for this. Recommended settings for sample width and height is that you keep one aspect on 24 and set the other accordingly. For example, if you have sample images that are 320×240 then first calculate the aspect ratio which in this case is 1.33:1 then multiply the bigger number with 24. You’d get 32×24 for sample width and height.
You can also set the feature type to HAAR or LBP. Make sure to use HOG only if you have OpenCV 3.1 or later. HAAR classifiers are very accurate but require a lot more time to train so it is much wiser to use LBP if you can provide your classifiers with many sample images. LBP classifiers on the other hand are less accurate but train much quicker and detect almost 3 times faster.
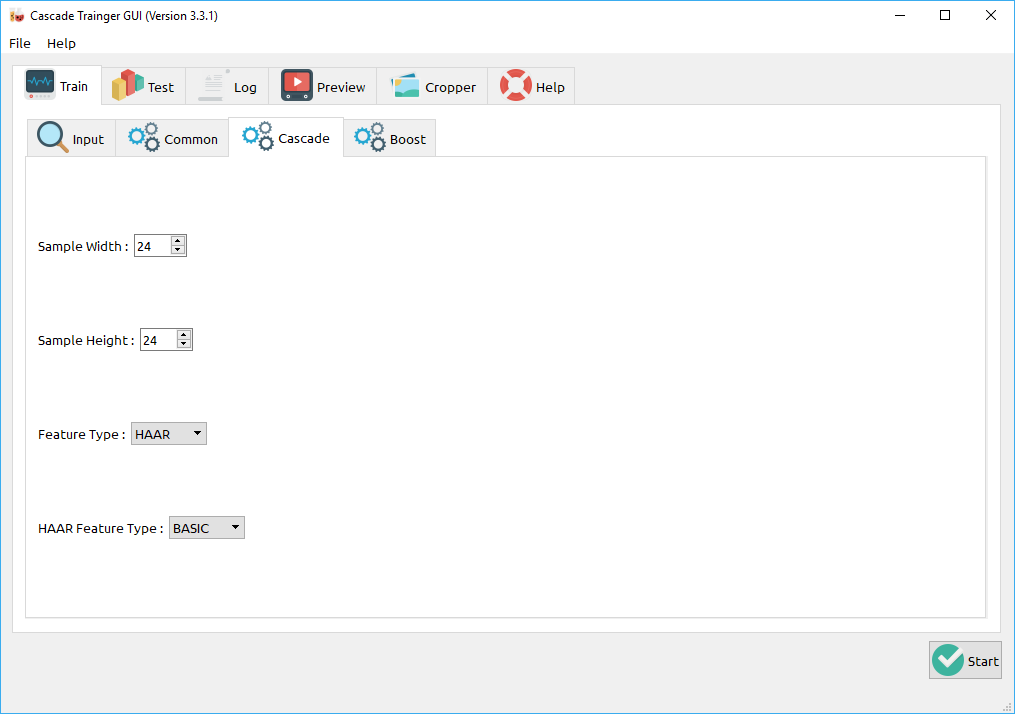
As for the parameters in the Boost tab, it is recommended to keep the default values unless you are quite sure about what you’re doing.

After all the parameters are set, press Start button at the bottom to start training your cascade classifier. You’ll see the following log screen while training is going on.
Wait for the training to complete.
Now if you exit Cascade Trainer GUI and go to the classifier folder you will notice that there are new files and folders are created in this folder.
“n” and “p” are familiar but the rest are new. “classifier” folder contains XML files that are created during different stages of training. If you check inside “classifier” folder, you’ll notice something similar to the following.
“stage#.xml” files are temporary files that won’t be needed anymore.
“params.xml” contains the parameters you have used for the training. (Just a reminder file)
“cascade.xml” is the actual cascade classifier and if the training completed successfully then you should have this file inside classifier folder.
“neg.lst”, “pos.lst” and “pos_samples.vec” are temporary files created for training the classifier and they can also be removed without having any effect.
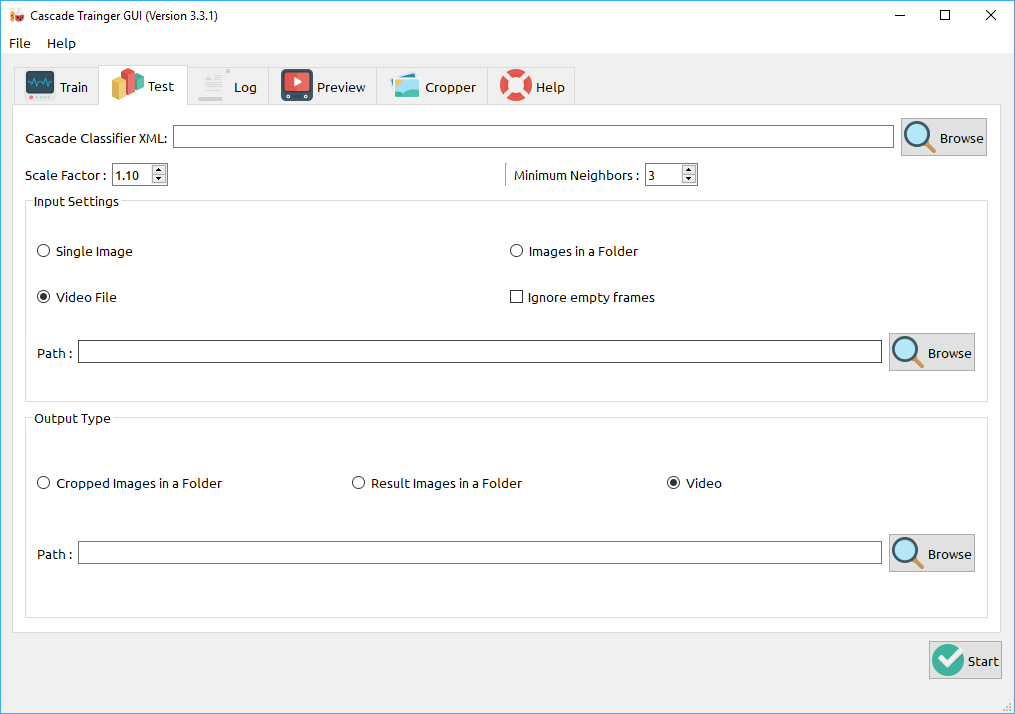
To test your classifiers, go to Test tab from the tab bar at the top and set the options as described below and finally press Start.
Select your cascade classifier using the Browse button at the top. You can also manually enter the path to cascade XML file in the Cascade Classifier XML field. This cascade classifier will be used for detection in images and/or videos.
You can select one of the following for Input Settings and you need to set the path according to this option:
• Single Image: A single image will be used as the scene in which detection will be done. In this case Path should point to a single image file. (Only supported images can be selected.)
• Images in a Folder: A folder containing many images will be used for testing. In this case Path should be set to a folder that contains one or more scene images.
• Video: A video file will be used for testing the classifier. In this case Path should point to a video file that will be used as input.
After setting the input settings it is time for output settings. Output type and path should be set according to what was chosen in input settings. See below:
• Images in a Folder: Detected objects will be saved to multiple images inside a folder. In this case Path should be set to a folder. Note that this option can be used with all of the possible options in input.
• Video: A video file with the detected objects highlighted with a red rectangle will be created. In this case Path should point to a video file that will be created after the test completes. Note that this option will only work if Video is selected in the input settings.
After clicking on Start button test will start. You’ll see a progress bar and the following preview screen with results.
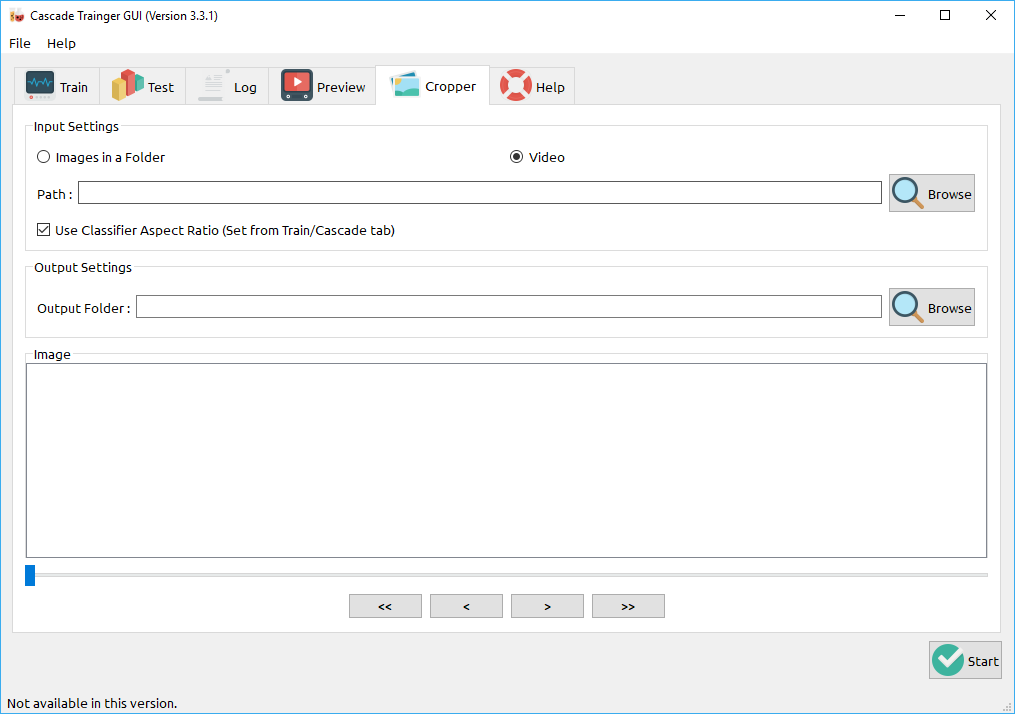
You can also use Cropper tool to crop images from the object you want to detect. It provides very simple tools to achieve this. Try to use relevant negative images and always separately train objects that are too much visually different. You can crop images from frames in a video file or from a folder full of images.
4. Download
Updated: July 05, 2017 (Bug fixes and cropper improvements – version 3.3.1)
Updated: March 13, 2017 (Updated Windows versions to 3.1.1.0 which includes fixed cropper tool)
Updated: November 09, 2016 (Updated Ubuntu version to 2.1.10)
Updated: November 07, 2016 (Many enhancements to cropper, training and testing utilities. Version x64 for Windows is built using Intel TBB and works much faster now for training. It is also the recommended version as of now.)
Updated: October 27, 2016 (Added two more parameters to UI. Neg count and Pos usage percentage.)
Updated: October 19, 2016 (Fixed an issue with file names in positive and negative images folders.)

Keep me informed about the issues or your suggestions using Contact Me page.