This guide is quite similar to my previous How-Tos about building OpenCV from source codes and using them in Qt, but I wanted to created a fresh one and point out a few of the changes made in this recent OpenCV version that requires you to reconfigure your Qt projects just a bit.
First things first, you must have installed Xcode before everything else. If you don’t have Xcode, just go to App Store and get it using this link.
Now start by getting the source codes from OpenCV website, by going to the Releases page and downloading the highest version of OpenCV 4 you can find there, which at the time of writing this article is OpenCV 4.1.0.
As a tip for professional users, here’s how I usually do it instead of getting a zipped copy of source codes:
- Clone OpenCV sources from GitHub, either using the Terminal (if you desperately want to torture yourself) or using a nice Git client (such as Sourcetree or anything else you use for that reason)
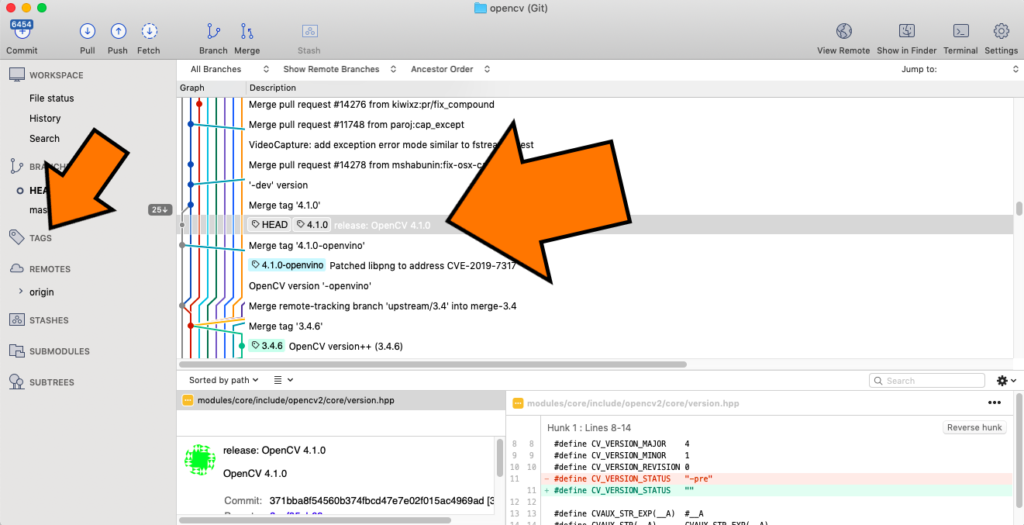
- Switch to the latest version by using the Tags
Here is a screenshot showing how the latest version of OpenCV is fetched on macOS using Sourcetree:
Now make sure you have CMake on your computer since we’re going to configure OpenCV for building. Run CMake and choose the sources folder by clicking on “Browse Source”. This is the path to the OpenCV source codes, either the ones you cloned from GitHub or the ones you extracted from a zip file you downloaded from OpenCV website. Let’s assume it’s in the following folder:
/Users/amin/dev/opencvYou need to choose a build folder as well, so click on “Browse Build” and choose the folder where you want to use as the build folder for OpenCV. Assuming the previous one as the source codes folder, enter something like this for the build folder:
/Users/amin/dev/opencv/buildNow hit the “Configure” button in CMake to start the configuration process. If you get warning saying the build folder doesn’t exist, just answer “Yes” to the question about creating it.
You’ll be greeted with a dialog asking you to “Specify the generator for this project”. Make sure “Unix Makefiles” is selected and the radio button for “Use default native compilers” is active, then press “Done”.
After a few moments the configuration will end and you need to set the 3rd important folder for your OpenCV build, which is the install folder and in CMake it’s labeled as “CMAKE_INSTALL_PREFIX”, and by default it’s set to the following folder which we’re going to change:
/usr/localThe reason why it’s a good idea to change it, is that you might need to have multiple OpenCV builds with different configurations and it’s easier to distinguish them if they’re in different folders. So set the OpenCV install folder, or “CMAKE_INSTALL_PREFIX” to something like this:
/Users/amin/dev/opencv/build/installThe last parameter we’re going to configure is also an optional parameter but it also helps us configure and deploy our applications much easier. It’s called “BUILD_opencv_world” and it allows creating a single library file called “libopencv_world.dylib”. So make sure the checkbox next to “BUILD_opencv_world” is checked and press the “Configure” button.
After the configuration is ended, you need to press “Generate”. This will generate all the files necessary for building. Now open up a Terminal and enter the following commands:
cd /Users/amin/dev/opencv/build
make
This might take quite some time but eventually it’ll finish and you need to enter the following command:
make installNote that if the folders you have used for OpenCV build and installation are in a privileged path, you need to prepend “sudo” to the commands above.
This concludes the first part of the tutorial which is building OpenCV 4 for macOS. Now we’re going to configure a Qt5 project to use OpenCV 4 libraries.
Assuming you already have downloaded and installed Qt5 for macOS, you can run Qt Creator and create a new project, either a console app or widgets, depending on what you need. Then add the following to the *.pro file of your project, right at the end of the file should be ok:
macx {
    INCLUDEPATH += "/Users/amin/dev/opencv/build/install/include/opencv4"
    LIBS += -L"/Users/amin/dev/opencv/build/install/lib" \
        -l"opencv_world"
}
You can start building your computer vision project now by using OpenCV 4 and Qt5, have fun!


